Create New Report from a Clone
If enabled for your agency and your user role, you can use the Clone feature to quickly create a new report or citation with similar data as an existing form.
Required fields on a form are denoted by red text (or another color depending on the color theme you have selected - see Change Layout Settings for information about changing your Coplogic™ Ethos color theme). 
For general information and tips about working with report templates, see Report Forms. |
Procedure
-
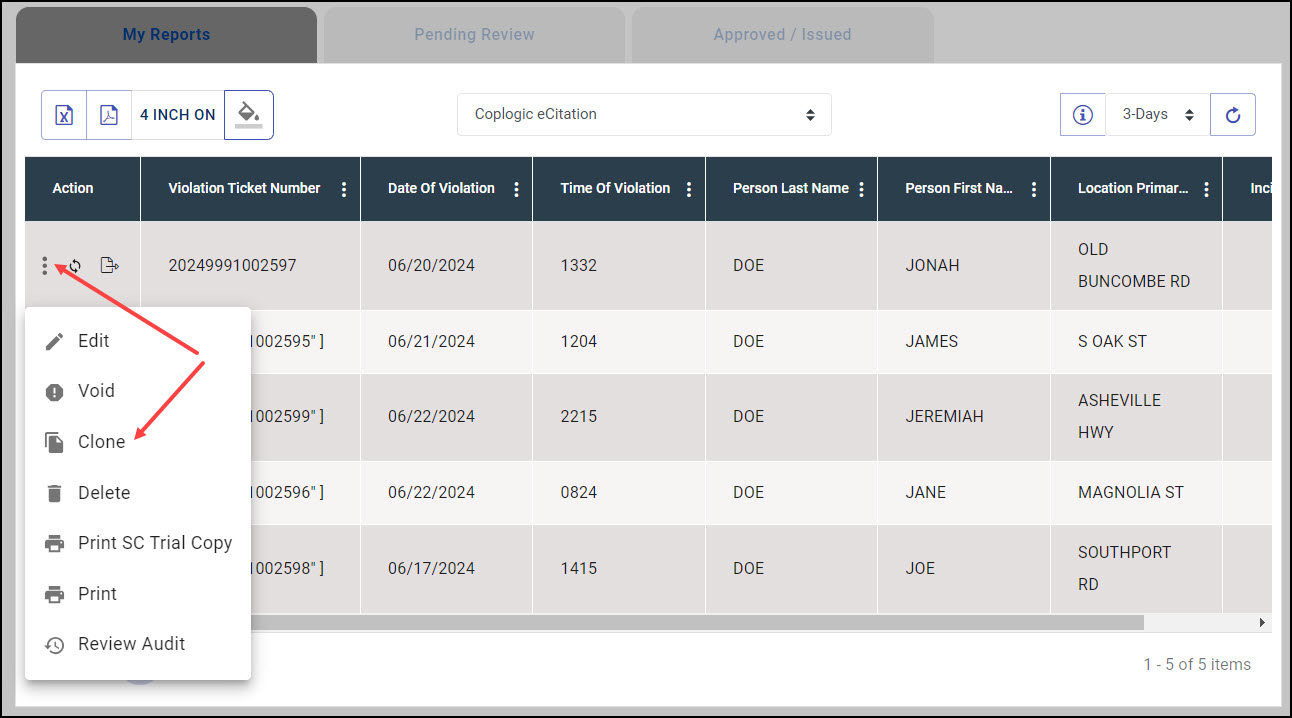
On your queue of existing reports, click the vertical ellipsis
 in the Action
column for the form you want to clone.
-
Click Clone.
 Ethos will create a form and will duplicate pre-defined fields from the original. (It does not always clone the form entirely and may only clone some fields but this is set up at either state, agency, or form level.
The duplicate will have a different report/ticket number than the original report, and also shows you as the officer even if you are not the officer listed on the original form. -
Edit as many fields as needed for the new form.

You must be sure when working on a cloned form to edit the appropriate fields as needed to ensure the form reflects the correct data for the new report or citation. -
You can move from page to page by clicking the Next or Previous button at the bottom of the page. Alternatively, you can select a
page or section from the vertical menu bar.

You can use the Search Data and Barcode Reader features to help you quickly populate person and vehicle sections with data that has been scanned into the system using the Coplogic™ Ethos Mobile application. For more information, see Add Person or Vehicle Information to a Report. -
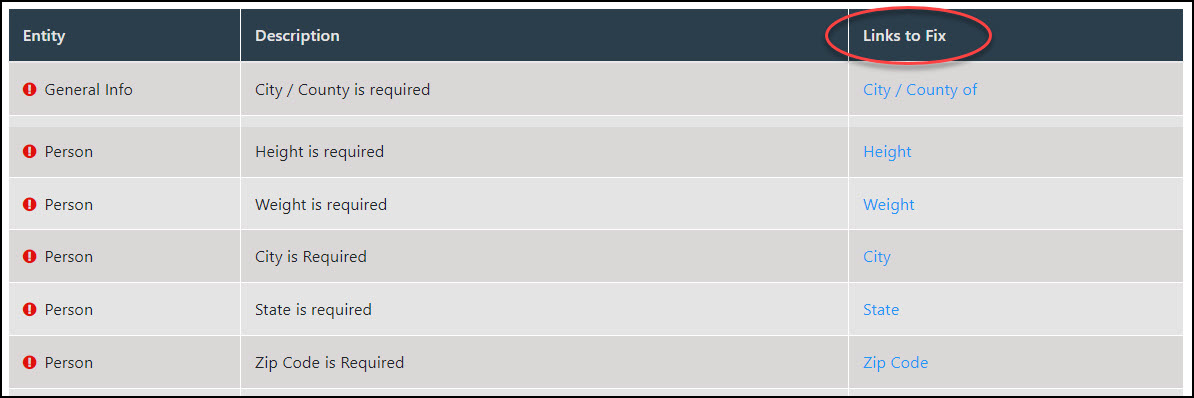
When you get to the last page of the form (usually called Finalize), if required data is missing or invalid, you will see a list of the invalid fields. Click the
links in the right hand column to go to that section of the form so you can complete the fields as required.

-
Next, verify the Officer fields are complete and accurate.

You will not be allowed to submit a report until all required fields have been completed and the entered data has met all validation rules/criteria your agency has prescribed for the field (for example, a date is out of a specified range or the length of entered data doesn't meet what is required for that field). -
If the form requires your signature, you can sign it digitally using your mouse or touch pad to draw your signature. If using a touchscreen device, use your finger or stylus to
draw your signature.

If you have an e-Signature set up in your user profile, Ethos will automatically load it to the signature field on the form. For information on managing your e-signature, see Create a Digital Signature. -
After all validation errors have been remedied and officer information and signature fields completed, you can submit the incident report or issue the citation. Follow the
instructions in the table based on which type of form you are submitting.
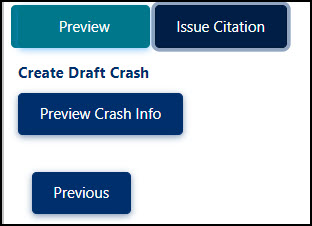
Citation - Click Preview to get a sneak peek at the citation. The preview image will open in a new instances of your browser.
- To create an associated incident report, click Preview Crash Info. If the information looks correct, click Confirm Create
Crash.

- Click Issue Citation when ready to submit the citation.
- Obtain the violator's signature if required.
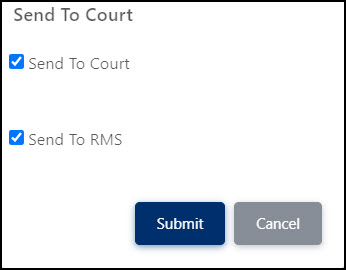
- Verify any additional actions such as Send to Court or Send to RMS.

Incident Report Click Submit. - You have successfully submitted or Issued a citation when Ethos window takes you back to your Dashboard screen and a printable PDF of the report is generated for you in a new tab of your browser window.

